

Давайте добавим анимацию к одному из Актёров (анимируем актёра).
Скачать исходники для статьи можно ниже
Вторую часть создания 2D игры читайте здесь — Android Studio и LibGDX: Создаем простую 2D игру (Часть 2)
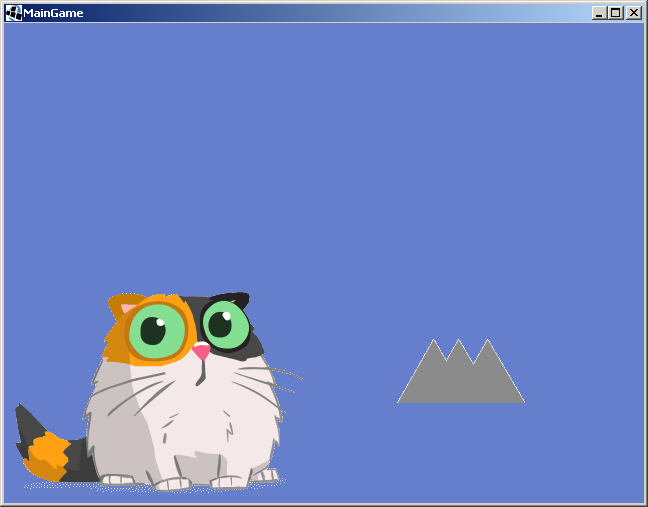
Давайте анимируем Актёра – Jugador.
Теперь он станет кошкой и будет моргать глазками и махать ушками:
Для этого нам понадобится исправить код в 2-х файлах: ActorJugador и MainGameScreen.
Код MainGameScreen:
package com.mygdx.game;

import com.badlogic.gdx.Gdx;
import com.badlogic.gdx.graphics.GL20;
import com.badlogic.gdx.graphics.Texture;
import com.badlogic.gdx.graphics.g2d.TextureAtlas;
import com.badlogic.gdx.graphics.g2d.TextureRegion;
import com.badlogic.gdx.scenes.scene2d.Stage;
import com.mygdx.game.actors.ActorJugador;
import com.mygdx.game.actors.ActorPinchos;


public class MainGameScreen extends BaseScreen {
    public MainGameScreen (MainGame game) {
        super(game);

        texturePinchos=new Texture("pinchos.png");
        regionPinchos=new TextureRegion(texturePinchos, 0, 64, 128, 64);


    }

    private Stage stage;
    private ActorJugador jugador;
    private ActorPinchos pinchos;

    private Texture texturePinchos;
    private TextureRegion regionPinchos;

    private TextureAtlas textureAtlas;


    @Override
    public void show() {

        stage = new Stage();
        jugador = new ActorJugador(textureAtlas);
        pinchos=new ActorPinchos(regionPinchos);

        stage.addActor(jugador);
        stage.addActor(pinchos);


        jugador.setPosition(20,100);
        pinchos.setPosition(500,100);
    }

    @Override
    public void hide() {
        stage.dispose();

    }

    @Override
    public void render(float delta) {
        Gdx.gl.glClearColor(0.4f, 0.5f, 0.8f, 1f);
        Gdx.gl.glClear(GL20.GL_COLOR_BUFFER_BIT);
        stage.act();
        comprobarColisiones();
        stage.draw();
    }

    private void comprobarColisiones(){
        if (jugador.isAlive()&&jugador.getX()+jugador.getWidth()>pinchos.getX()){
            //System.out.println("Colision");
            jugador.setAlive(false);
            game.setScreen(game.gameOverScreen);
        }
    }

    @Override
    public void dispose() {

        texturePinchos.dispose();
        textureAtlas.dispose();
    }
}
В нём убрал текстуры для Актёра Jugador, а также создал TextureAtlas.
Код файла ActorJugador:
package com.mygdx.game.actors;

import com.badlogic.gdx.Gdx;
import com.badlogic.gdx.graphics.g2d.Animation;
import com.badlogic.gdx.graphics.g2d.Batch;
import com.badlogic.gdx.graphics.g2d.TextureAtlas;
import com.badlogic.gdx.graphics.g2d.TextureRegion;
import com.badlogic.gdx.scenes.scene2d.Actor;


public class ActorJugador extends Actor {

   private TextureAtlas textureAtlas;
   private Animation animation;
    private float stateTime;


    private boolean alive;

    public boolean isAlive() {
        return alive;
    }

    public void setAlive(boolean alive) {
        this.alive = alive;
    }

    public ActorJugador(TextureAtlas jugator){

        this.alive=true;
        setSize(279,225 );

        textureAtlas=new TextureAtlas(Gdx.files.internal("catatlas.atlas"));
        animation=new Animation(1/7f,textureAtlas.getRegions());

    }

    public void act (float delta){
        super.act(delta);
    }

    public void draw (Batch batch, float parentAlpha){
        super.draw(batch, parentAlpha);
        stateTime += Gdx.graphics.getDeltaTime();
        batch.draw((TextureRegion) animation.getKeyFrame(stateTime, true), 10, 10);

    }
}
Для анимации я использовал 2 файла (catatlas.atlas и catatlas.png), которые поместил в папку assets:
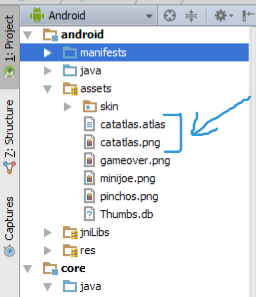
Скачать данные файлы можно по следующей ссылке – скачать catatlas.atlas и catatlas.png.
Как создать Атлас Текстуры (catatlas.atlas и catatlas.png) из набора картинок или gif анимации читайте тут – Создаём атлас текстур с помощью LibGDX.
Похожие записи:
") Android Studio и LibGDX: Создаем простую 2D игру (Машинки)
Android Studio и LibGDX: Создаем простую 2D игру (Машинки)- Android Studio и LibGDX: Создаем простую 2D игру (Часть 1)
- Android Studio: Создаем аудиоплеер (вариант 3)
- Создаём атлас текстур с помощью LibGDX
- Android Studio и LibGDX: Создаем простую 2D игру (Часть 2)
- Создаём простую Android игру: Марсианин (Часть 2)